
What is the installation process for stairlifts on spiral and awkward staircases?
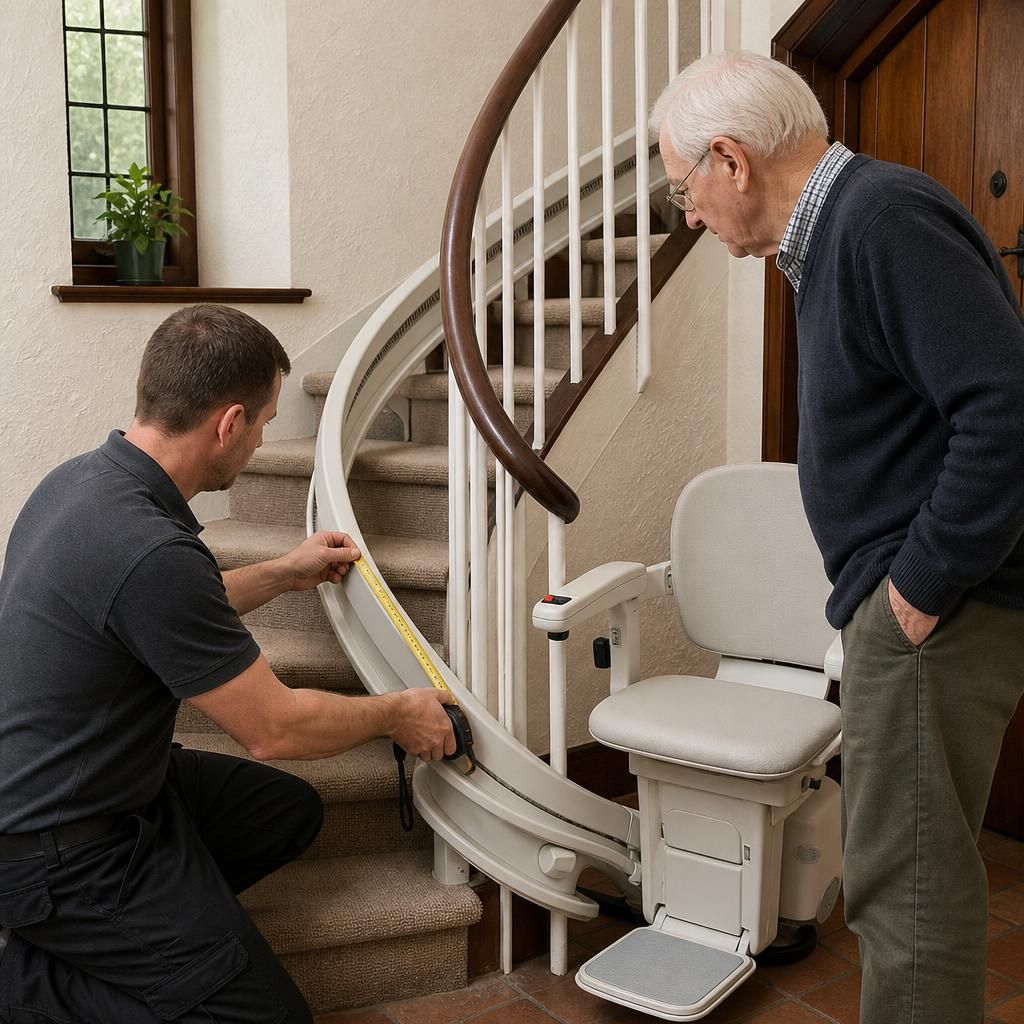
Installation begins with an in-home assessment and detailed survey of the staircase, including its curves, angles, width, landings and surrounding access space. A bespoke rail and stairlift are then designed, fitted and thoroughly tested on site, with the installer checking safe travel, clearances and controls before demonstrating the system to you.
Installation on a spiral or awkward staircase starts with a detailed home assessment rather than fitting a standard stairlift. An adviser or surveyor examines the staircase, measures its curves, angles, width, landings and available clearance, then recommends a stairlift and rail designed for the specific space. Once the design has been confirmed, the bespoke rail is manufactured, installed and tested at your property.
1. Initial assessment and discussion
The first stage is to understand how you use the stairs and what you need the lift to do. The assessment normally covers:
- Which floors the stairlift must serve and where you need to get on and off.
- Whether you need to carry shopping, walking aids or other items.
- Which side of the staircase is most suitable for the rail and seat.
- Any difficulties with balance, bending, transferring or operating controls.
- Whether other people need to continue using the stairs alongside the stairlift.
- Any doors, radiators, bannisters, windows or low ceilings that could affect installation.
On a spiral staircase, the surveyor pays particular attention to the direction and tightness of the curve, the changing tread depth and the space available at the top and bottom. On an awkward staircase, the assessment may need to account for half-landings, narrow passages, unusual angles, restricted headroom or a staircase that changes direction more than once.
2. Detailed survey and feasibility checks
The staircase is measured and photographed or digitally surveyed so that the rail can follow its actual profile. The installer checks the strength and condition of the stair treads, the fixing points and the surrounding structure. They also consider the clearance between the lift, walls, doors and users of the stairs.
This stage establishes whether a stairlift can be installed safely and where the lift can stop without obstructing a doorway or access route. If a conventional seated stairlift would not provide sufficient clearance, alternative arrangements may be discussed, such as a more compact seat, a different parking position or a design that allows the user to approach the seat more safely. The final recommendation should be based on the staircase and the user, not simply on the appearance of the equipment.
Where the property is listed or subject to building restrictions, it is sensible to identify any permission requirements before work is scheduled. The installer can explain what fixing methods and visible changes are proposed, although responsibility for obtaining any required consent may rest with the property owner or the relevant authority.
3. Bespoke design and confirmation
The survey information is used to design a rail that follows the staircase closely. For spiral and curved stairs, this usually involves a made-to-measure rail with carefully calculated bends and transitions. The design must balance smooth travel with usable boarding and exit positions, adequate clearance and access for anyone still using the staircase.
You should receive an explanation of the proposed route, seat configuration, controls, charging points and parking positions before installation. This is the opportunity to raise practical concerns, such as where the stairlift will be left when not in use, whether a powered swivel seat would make transfers easier, or how the lift will be used during a power cut. The design is then approved and the rail is manufactured to the surveyed measurements.
4. Preparing the staircase and electrical supply
Most stairlifts are fixed to the stair treads rather than the wall. This is particularly useful where a wall is curved, unsuitable for structural fixings or needed for handrail access. The installer confirms that the treads can accept the fixings and identifies the safest positions before drilling.
A suitable electrical supply and charging arrangement are also checked. Many stairlifts charge at a designated parking point, so the installer needs to ensure that the lift can be parked where it remains available and does not block a landing or doorway. Any electrical work should be completed safely and in accordance with the applicable requirements for the installation.
5. Fitting the rail and stairlift
On the installation day, the rail sections are positioned and secured to the staircase. On a spiral or unusually shaped stair, the sections must align accurately so the lift travels smoothly through every curve and change in angle. The drive system, seat, footrest, armrests, controls and safety sensors are then fitted and adjusted.
The installer takes care around narrow or occupied areas and normally protects the surrounding surfaces while working. Installation methods vary according to the rail design and the condition of the staircase, but the aim is to keep disruption controlled and avoid unnecessary alterations to the property.
6. Testing and adjustment
Before the stairlift is handed over, it is operated repeatedly along the complete route. Checks normally include:
- Smooth movement through every bend, transition and stopping position.
- Clearance from walls, ceilings, doors, bannisters and the edge of the stairs.
- Correct operation of the seat belt, swivel mechanism, footrest and controls.
- Safety sensors stopping the lift if they detect an obstruction.
- Charging, battery operation and the correct response to the controls.
- Secure fixings and stable operation when the seat is occupied.
- Safe boarding and exit positions at the top and bottom of the staircase.
Adjustments can be made during commissioning if the seat position, speed of a transition or parking location needs refining. A bespoke installation should not be considered complete until the lift has been tested on the actual staircase and the installer is satisfied that it operates as intended.
7. Demonstration and handover
The installer demonstrates how to call and send the stairlift, use the seat and controls, secure the seat belt, swivel safely where fitted, charge the batteries and deal with a stopped lift or power interruption. You should also be shown how to keep the rail and sensors clear, what basic checks to carry out and who to contact if servicing or a repair is required.
After handover, use the stairlift as demonstrated and report any unusual noise, hesitation, rubbing or change in operation promptly. Spiral and awkward staircases place particular importance on accurate surveying and commissioning, so follow-up advice or an adjustment may be appropriate if your day-to-day use identifies an issue that was not apparent during the initial demonstration.
For a spiral or awkward staircase, installation begins with a detailed survey rather than fitting a standard rail. The installer measures the staircase’s curves, angles, tread widths, landings, headroom and surrounding clearances to establish whether the stairlift can travel safely and where it can be parked without blocking access.
These measurements are used to design a bespoke rail that follows the staircase closely. The installer also checks fixing points, doors, bannisters and electrical requirements before the rail is manufactured. Once fitted, the stairlift is tested repeatedly along the complete route, including every bend, boarding position and stopping point, before its controls and safe operation are demonstrated to you.
Arrange your free stairlift assessment
Arrange your free stairlift assessment to discuss your spiral or awkward staircase, confirm what is feasible and identify the most suitable bespoke solution for your home.