
What should I expect during the spiral stairlift installation process?
The spiral stairlift installation process usually includes a detailed home assessment, bespoke rail manufacture, professional fitting, safety testing and a demonstration of how to use the lift. Your installer will also check that the stairlift suits the staircase, user and surrounding space before completing the installation and explaining ongoing support.
The spiral stairlift installation process normally involves a detailed home assessment, a bespoke design for the staircase, manufacture or preparation of the rail, professional fitting, comprehensive safety checks and a practical demonstration. Because a spiral staircase changes direction and may have restricted space, the installer must assess both the stairway and the user’s needs before confirming the final design.
1. The home assessment
An experienced surveyor will inspect the full route from the bottom to the top of the staircase. This includes measuring the width, gradient, curvature and available headroom, as well as checking the shape and position of each tread. The assessment will also consider the landing areas, doorways, radiators, windows, bannisters and any other features that could affect the lift’s movement or the user’s ability to get on and off safely.
The surveyor will discuss how you intend to use the stairlift, including where you usually sit, whether you need to approach from a particular direction and how easily you can transfer into the seat. Your height, posture, mobility, balance and ability to operate the controls can all influence the choice of seat, armrests, footrest and controls. If more than one person may use the lift, this should be raised during the assessment.
They will also check the electrical supply and identify the most suitable position for charging equipment. Where the existing arrangement is not suitable, any required electrical work should be explained before installation rather than being unexpected on the day.
2. Agreeing the design
A spiral stairlift usually needs a rail designed to follow the individual staircase rather than a standard straight rail. The rail may curve around the central part of the stairs and can be configured to finish in a position that allows a safer transfer at the top or bottom. The surveyor will explain the available options and any practical limitations caused by the staircase layout.
Depending on the design, you may discuss a swivel seat, powered or manual folding parts, hinged sections, different control positions or a choice of upholstery and finishes. These are not simply cosmetic decisions. The correct arrangement can help you approach the seat, turn safely at the landing and keep the stairway as usable as possible for other household members.
Before work begins, you should receive clear information about the proposed layout, the equipment being supplied, the installation requirements and the agreed price. Ask about anything that is unclear, including what happens if the survey identifies an unforeseen obstruction or if the design needs to change.
3. Preparing for installation
Once the design has been approved, the bespoke rail and associated components are prepared for the staircase. The installation team should confirm the planned date and explain whether any preparation is needed in your home. You may need to clear ornaments, furniture, pictures or other items close to the stairs and landings so the fitters can work safely.
It is helpful to keep the access route clear and to tell the installation team about pets, alarm systems or any household routines that could affect access. If you rely on the existing stairs, discuss this in advance so you know whether they will remain partly accessible during the work. A member of the household should normally be available to answer questions and receive the operating demonstration, although the exact arrangements will depend on the installation.
4. Fitting the stairlift
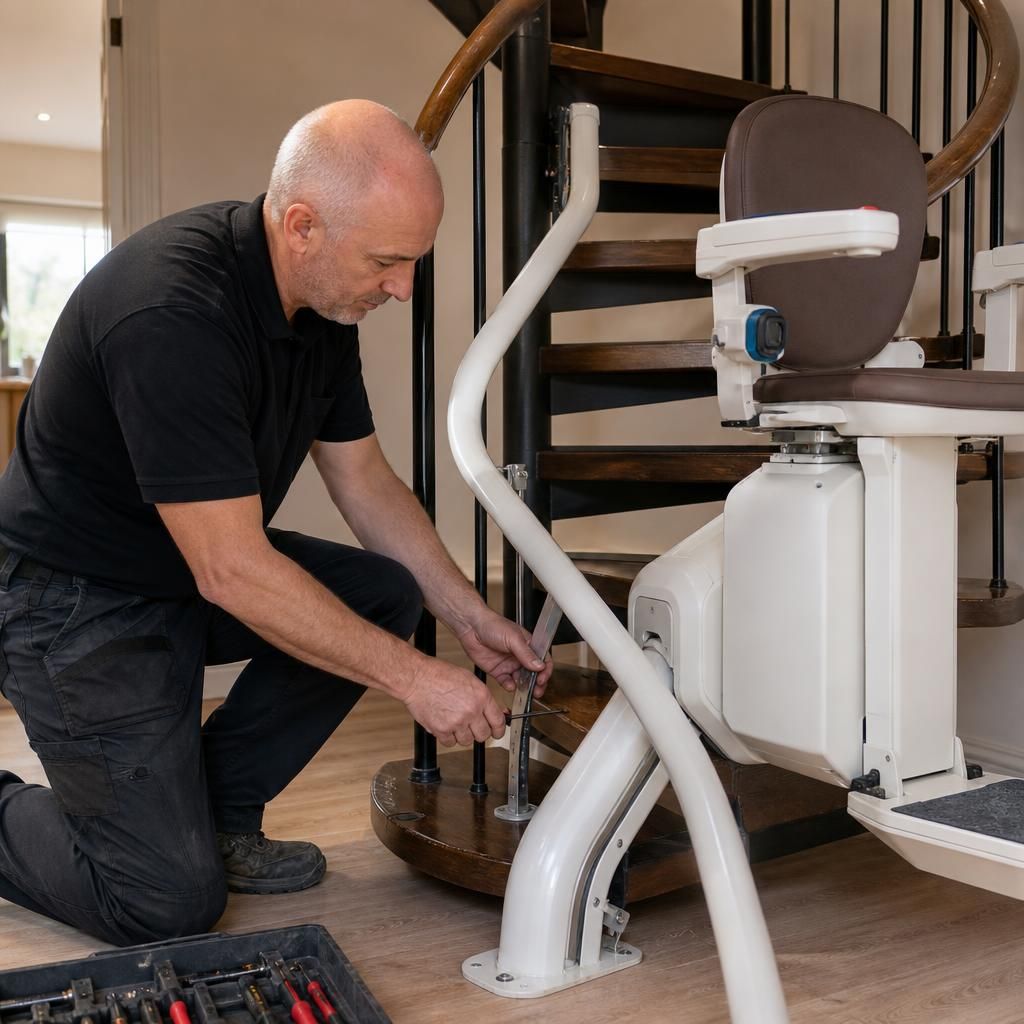
On the day, the fitters will protect the relevant areas where necessary, bring in the rail and equipment, and position the rail according to the agreed design. Spiral stairlift rails are commonly secured to the stair treads or suitable structural parts of the staircase, rather than relying on the wall. The fixing method must suit the construction and condition of the stairs.
The rail is aligned carefully so the carriage can travel smoothly around each curve without contacting walls, bannisters or other obstacles. The seat, footrest, safety arms, controls, sensors, charging points and other components are then fitted and connected. The installer should keep you informed if the actual structure differs from what was found during the survey or if any adjustment is required.
Some drilling, light noise and temporary obstruction of the staircase are normal during fitting. A competent installation should nevertheless be carried out neatly, with fixings secure and cables positioned so they do not create a trip hazard or interfere with the lift.
5. Testing and final safety checks
After fitting, the installer will run the stairlift repeatedly along its complete route. Checks should cover smooth starting and stopping, movement through each bend, the operation of the seat and footrest, charging, control switches and any powered features included in the design.
Safety devices are tested to confirm that the stairlift responds correctly if an obstruction is detected or if a safety edge, arm or control is used. The installer should also check that the seat locks in the correct travelling position, that swivel or folding mechanisms operate properly and that the lift stops in the intended boarding and dismounting positions.
The completed installation should be inspected for secure fixings, suitable clearances and a safe route at the top and bottom. You should be told about any restrictions that apply, such as keeping the track clear or using the lift only with the seat and safety equipment positioned correctly.
6. Demonstration and handover
Before leaving, the installer should demonstrate the complete operating sequence. This normally includes how to:
- position yourself safely before sitting down;
- fasten and release the seat belt;
- operate the control and stop the lift if needed;
- use the swivel seat, footrest or other fitted features;
- park and charge the stairlift correctly; and
- respond if the lift stops or displays a warning.
You should have the opportunity to operate the lift yourself, rather than only watching the demonstration. Take time to practise approaching the seat, sitting down, travelling, stopping at the landing and getting off. If you find a control difficult to reach or understand, tell the installer before the handover is completed. Small adjustments to the position or setup may make everyday use easier.
7. Information about ongoing support
You should receive operating and safety information, details of the warranty or service arrangements and instructions for reporting a fault. Keep this information where it can be found easily. The installer should also explain basic user checks, such as keeping the rail and charging area clear and reporting unusual noises, jerky movement, loss of power or warning indicators rather than continuing to use the lift if it appears unsafe.
Installation does not remove the need for sensible daily use. The stairlift should be used as instructed, within its stated user and equipment limits, and should not carry additional people or objects unless the equipment is specifically designed for them. Regular servicing can help identify wear and maintain safe operation, particularly where the lift is used frequently.
What if the staircase presents a problem?
A spiral staircase may have unusual tread shapes, limited landing space, uneven surfaces or structural features that affect the installation. A proper assessment should identify these issues before fitting. If the proposed stairlift cannot provide safe boarding, travel or dismounting, the installer should explain the limitation and discuss whether an alternative configuration or accessibility solution is appropriate. Do not agree to a design that leaves insufficient clearance or makes transfers unnecessarily difficult simply because it is the quickest option.
If you have a change in mobility, a new difficulty with transfers or concerns about using the stairlift after installation, contact Independent Stairlifts for advice. The equipment, controls or seating arrangement may need reviewing, and faults should be dealt with by a qualified stairlift professional.
The handover is the final part of the spiral stairlift installation process, when the installer checks that you can use the lift safely and confidently. You should be shown how to approach the seat, use the controls, fasten the seat belt, operate the swivel seat or footrest, and stop the stairlift if necessary.
Ask to operate the stairlift yourself rather than only watching the demonstration. Practise boarding, travelling around the bends, stopping at the landing and getting off safely. The installer should also explain how to park and charge the lift, what warning signs to look for and who to contact if it develops a fault. Raise any difficulty with the controls, seating position or transfers before the installation is signed off, as small adjustments may make everyday use safer and more comfortable.
Arrange Your Spiral Stairlift Installation Assessment
Arrange your spiral stairlift installation assessment with Independent Stairlifts to discuss your staircase, mobility needs and the most suitable bespoke design. Our team can explain the installation requirements and answer your questions before work is scheduled.